The Connector Ribbon for Project 2010 / Project 2013 / Project 2016
The Connector creates a ribbon in Project for accessing all of The Connector functionality.

Send To JIRA
The Send To JIRA group provides buttons for performing the Send To JIRA operation and customizing how the process works.

Send To JIRA
Send To JIRA Customize
Update From JIRA
The Update From JIRA group provides buttons for performing the Update From JIRA operation and customizing how the process works.

Update From JIRA
Update From JIRA Customize
Sync All
The Sync All group provides buttons for performing the Sync All operation and customizing how the process works.
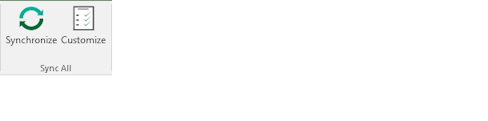
Sync All
Sync All Customize
Import
The Import group provides buttons for launching the import wizard and managing your import profiles that you have saved and/or shared.

Import Data from JIRA
Manage Import Profiles
Tools
The tools section provides buttons for configuring The Connector, launching the issue editor and a drop down tools menu.

Configure
Issue Editor
Tools
Search
The search functionality allows you to put in an issue ID and search the current project plan for a match. If found, the issue/task will be highlighted for you.

Options
The options group allows you to access the project information and make changes to the current schedule's mappings. It also provides a link to a menu with options for accessing help, visiting the website, submitting a bug, etc.

Project Information
Quick Launch
The quick launch group allows you to quickly launch the help system, visit The Connector website and access your currently active JIRA instance.

The JIRA Connector Toolbar for Project 2003 / 2007
The JIRA toolbar is the central management point for The Connector. The toolbar is fully dockable, so feel free to move the toolbar where it works best for you.
The toolbar contains access to all the functions of The Connector. The options are summarized below.
- Send to JIRA – Push task information to JIRA issues
- Update from JIRA – Pull issue, status, and worklog information into Microsoft Project
- Sync All – Bi-directionally exchange data between Microsoft Project and JIRA
- Tools / Link Issue – Link a Microsoft Project task with an existing JIRA issue
- Tools / Issue Editor – The issue editor allows for quick and easy access to all of the JIRA specific values related to a task.
- Tools / Task Browser – The task browser allows for a quick summary of all the tasks and their related issues in a project plan.
- Tools / Mark as JIRA Ignored – This function allows you to select multiple tasks and mark them all as JIRA Ignored.
- Tools / Remove Selected From JIRA – This function will remove all of the selected tasks from JIRA by deleting the issue.
- Tools / Unlink Selected Tasks – This function will unlink the Microsoft Project task from the JIRA issue.
- Tools / Validate Selected Tasks – This function will validate that all of the linked tasks have valid JIRA issues associated with them.
- Project Info – This dialog will show general summary information about the project plan.
- Import – This is a function that allows you to import JIRA issues into the current project plan.
- Configure – View and modify configuration information for The Connector
- JIRA Login / Logout – Login/logout to and from JIRA
The JIRA Menu
The Connector has a menu option that will appear between the Window and Help menu options on the main menu bar. From this menu, you can access all of the same functionality as the JIRA toolbar.
NOTE: This pertains to Project 2003 / 2007 only.
Logging into JIRA
The login screen of The Connector allows you to provide a username and password to log into JIRA with.
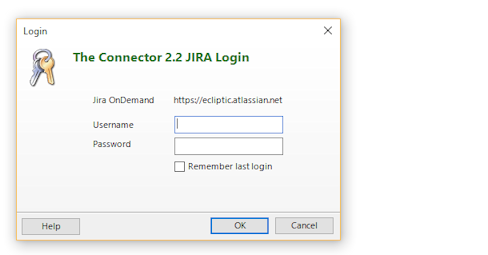
Provide a valid JIRA user account and log into JIRA. It is recommended that you use a JIRA account that has sufficient privileges to read and write JIRA issues.
Trial Version
The trial version of The Connector will display a trial screen before each option of the tool. To continue to use the trial version, simply press the “Continue with Trial” button. The trial version is fully functional for 30 days from the date of the installation.
Once you purchase your copy of The Connector, you will receive a product registration key that can be entered into the activation screen. Once activated, the product is fully functional.
Project Setup
Each time you create a new project schedule in Microsoft Project, the MPP file will need to be initialized. This process of iniitialization sets up the mappings between JIRA and Microsoft Project. Each piece of JIRA data is mapped to one of Microsoft Project's 30 user definable Text fields.
During this process, The Connector will retrieve from JIRA information like the issue types, priorities, statuses, custom field definitions and other relevant data. Each project file can have different mappings, although it is recommended that you use a consistent mapping configuration across all of your files.
Project Information
Setup Wizard
Configure The Connector
The configuration dialog allows you to set general system configuration options for The Connector.
Profiles
Settings
Personalization
Default Mappings
About
JIRA Endpoint
The JIRA endpoint is where you define connectivity information about your JIRA instance. The Connector allows you to setup any number of different endpoints (or JIRA instances) you wish. Each endpoint can have a different address, be a different JIRA version and use different authentication information.
Also, each endpoint can have its own proxy and HTTP authentication settings allowing different settings for local network instances verses other remote instances throughout your network or the Internet.
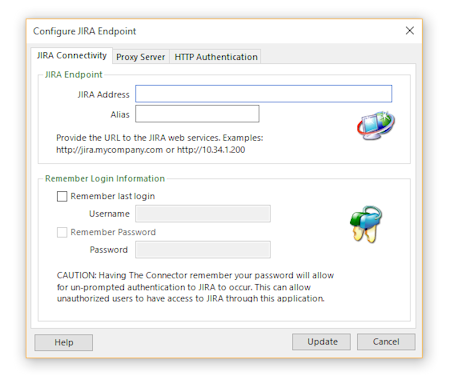
A JIRA endpoint has a field for the JIRA address. This address can use https or http as well as have different port numbers.
You can give each endpoint an alias (or friendly name) to help you distinguish between different settings.
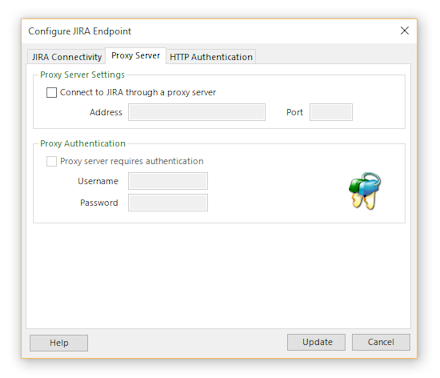
If your JIRA instance requires that you connect through a proxy server, you can specify the proxy settings here. You can provide the proxy server address, port and optional credentials if authentication is required.
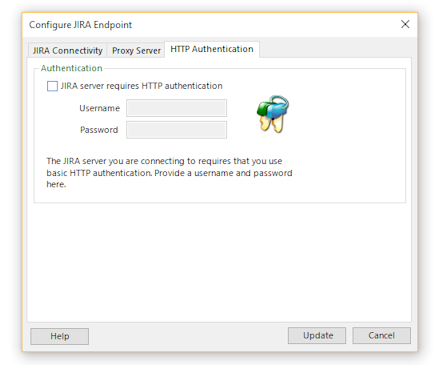
If the JIRA instance you are connecting to require HTTP authentication (generally another layout at the web server level), you can specify those settings here. Provide a username and password and when The Connector attempts to connect to JIRA, it will automatically provide these additional credentials to the web server servicing the call.
JIRA Profile
The JIRA Profile represents a collection of settings on how The Connector will perform the data exchange. The Connector allows configuration of multiple profiles, each having different settings. You can then select a profile to use depending on the action you wish to perform. Each profile can connect to a different JIRA instance or you can have multiple profiles connecting to the same JIRA instance, but having different configuration options.
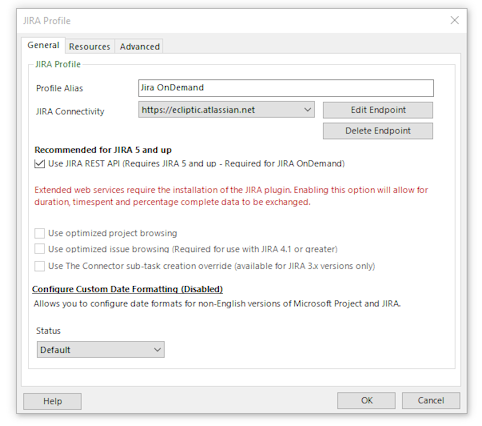
Profile Alias : The alias is simply a user definable name for the profile. When you are asked to select a profile, you will be given an option to choose among these names.
JIRA Connectivity: The JIRA Connectivity provides the setting on how to connect to JIRA. This includes an IP address or URL along with an optional port number. It can also be configured to use proxy servers and HTTP authentication depending on your server configuration. Click for more information.
Use optimized project browsing: Requires the extended web services be installed. This will increase performance when browsing projects and is recommended that it be turned on.
Use optimized issue browsing: Required for use with JIRA 4.1 or greater
Use extended web services: Requires the installation of the JIRA plugin. Enabling this option will allow for duration, time spent and percentage complete data to be exchanged.
Use The Connector sub-task creation override : Only used for JIRA versions 3.x
Do NOT turn on for newer versions of JIRA
Configure Custom Date Formatting: Allows you to configure date formats for non-English versions of Microsoft Project and JIRA. Click for more information.
Status: This shows the current status of the JIRA Profile. If there are multiple profiles setup one will be set as the default and the others will be set to Active / Inactive.
The Resources tab of the JIRA Profile configuration dialog allows you to configure how you wish to map resource names. This can be done differently for each profile you have configured.
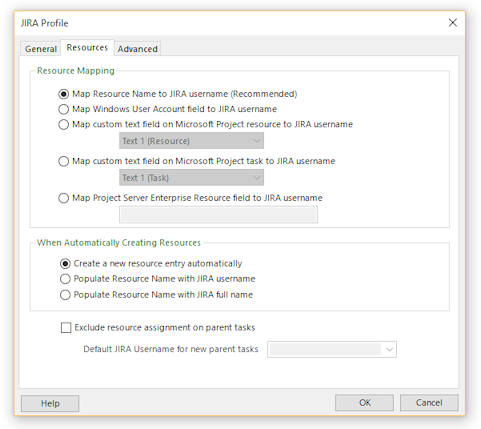
There are 4 ways resources can be mapped using The Connector
Map Resource Name to JIRA username (Recommended): The easiest and most basic way to map resource names is to ensure that the JIRA username and the Microsoft Project resource name are the same. This allows a one-to-one mapping when data is exchanged.
However, sometimes this one-to-one mapping is not sufficient. If you wish to have a different value in Microsoft Project then you have in JIRA, you must map the resource names so that the value in Microsoft Project knows what the JIRA username is. This can be done using one of the 4 mapping modes specified below.
Map Windows User Account field to JIRA username: This will use the Window User Account field (found on the resource in Microsoft Project) to hold the JIRA username.
Map custom text field on Microsoft Project resource to JIRA username: This will use a custom text field found on the resource in Microsoft Project to hold the resource mapping. There are 30 Text fields on the resource that can be used to hold this value.
Map custom text field on Microsoft Project task to JIRA username: This will use a custom text field found on the task in Microsoft Project to hold the resource mapping. There are 30 Text fields on the task that can be used to hold this value. Be sure that it is a Text field that is not currently being mapped to hold other JIRA information.
Map Project Server Enterprise Resource field to JIRA username: (This option only functions with Microsoft Project Server 2010.) This will use a custom resource field in Project Server to map to the JIRA username.
Click for more information regarding Resource Mapping.
Exclude resource assignment on parent tasks: When checked this option will not assign a resource to parent tasks when importing or updating from JIRA. The Default JIRA Username for new parent tasks is the user that should be assigned to a new task when sending to JIRA.
The Advanced tab of the JIRA Profile configuration provides buttons for configuring various other settings for The Connector.
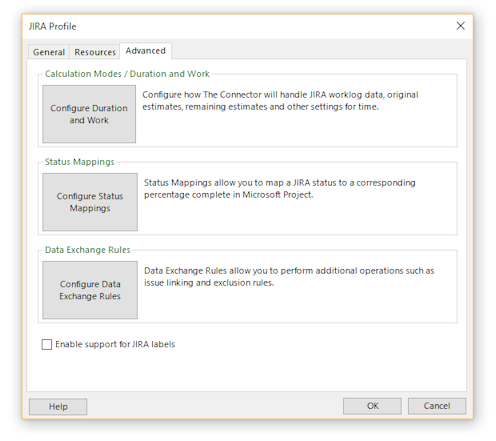
Configure Duration and Work: The duration and work configuration allows to configure how the values for the original estimate, remaining estimate and time spent values relate between Microsoft Project and JIRA. Click for more information
Configure Status Mappings: The status mappings allow you to configure how The Connector will use JIRA statuses to calculate percentage complete. Click for more information
Configure Data Exchange Rules: The data exchange rules allow you to control how The Connector will handle JIRA links and other types of exclusion rules. Click for more information