The Import function is the process of bringing new issues from JIRA into Microsoft Project. The Connector's import wizard allows for a number of filters, sorting and grouping parameters to be specified.
The import can either import based on projects from JIRA or it can use JIRA's saved filters as an import option. When you use the JIRA projects, The Connector does the filtering on the client side. When you use JIRA saved filter, the filtering is done on the server side (JIRA). Depending on the amount of data you are importing, you can see a significant performance increase if you use a filter to do the importing.
The Connector allows a user to create and save multiple import profiles that can be used as needed. It also allows for sharing import profiles with other users in a team environment if needed using The Connector's shared import profile feature. Click here for more information.
JIRA Import Wizard
This utility allows you to import issues from JIRA directly into Microsoft Project. You can order, group and filter the issues when you import them.
When you select Import from The Connector toolbar, you will get the start of the Import wizard.
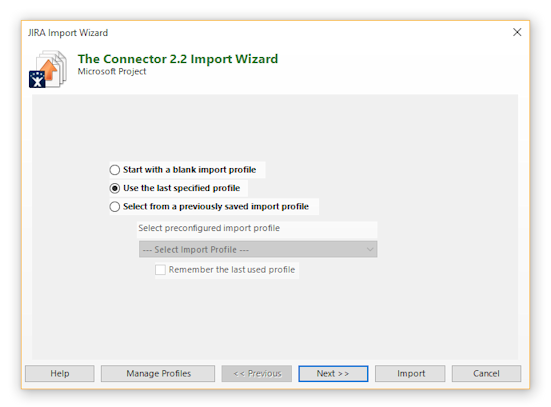
- Start with a blank import profile: This will start with a blank profile that you can configure with the options you wish.
- Use the last specified values: This allows you to quickly perform an import using the last values that you specified. This is helpful if you constantly import issues using the same settings.
- Select from a previously saved import profile: At the end of the wizard, you are able to name and save the profile for future use. Selecting this option will allow you pick from the list of previously saved profiles.
Click Next to proceed.
The wizard then allows you to pick which project or filters you wish to use for the import. The Connector does allow you to setup a filter within JIRA and import using that filter. With large amounts of data it may be beneficial to setup filters in JIRA and then the querying is done on the server rather than the client.
NOTE: The import can either choose multiple projects OR multiple filters but cannot choose a project and a filter.
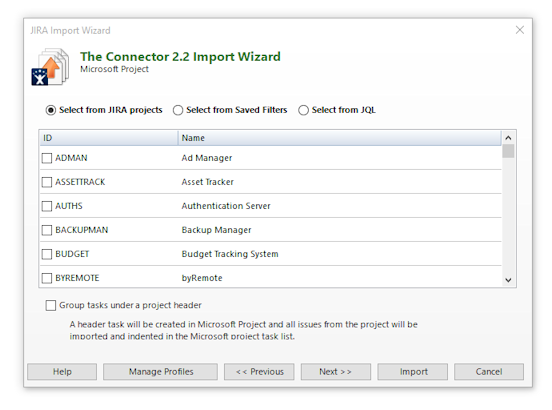
- Select from JIRA projects will list all available JIRA projects and you can check those you want to include.
- Select from Saved Filters will list of all filters that are saved in JIRA and you can check those you want to include.
- Group tasks under project header: If this option is checked, a header task in Microsoft Project will get created with the name of the project and tasks indented under the project.
Click Next to proceed.
Importing new tasks into an existing Microsoft Project plan.
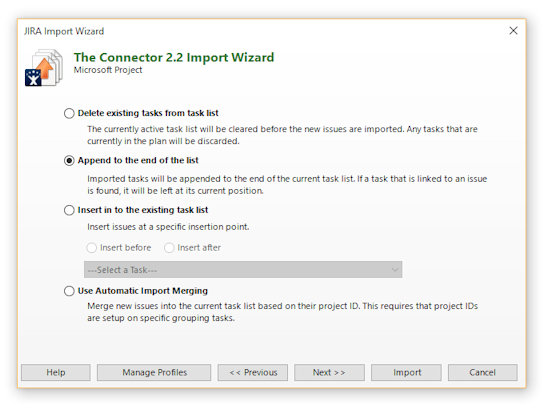
- Delete existing tasks from the list: The Connector will clear all the task from your currently open project plan before it begins doing the import.
- Append to the end of the list: The Connector will import and append the new tasks to the end of the task list of the currently open project plan. If the task currently exists in the list and matches the issue ID, it will not be added twice. It will be skipped during the import.
- Insert in to the existing task list: You can select an existing task from the current tasks in the Microsoft Project task list. All new issues will be inserted into the plan directly after or directly before the selected task. This is based on the "Insert before" and "Insert after" options that are available.
- Use Automatic Import Merging: Merge new issues into the current task list based on their project ID. This required that project IDs are setup on specific grouping tasks.
Click Next to proceed.
Importing sub-tasks into the Project plan.
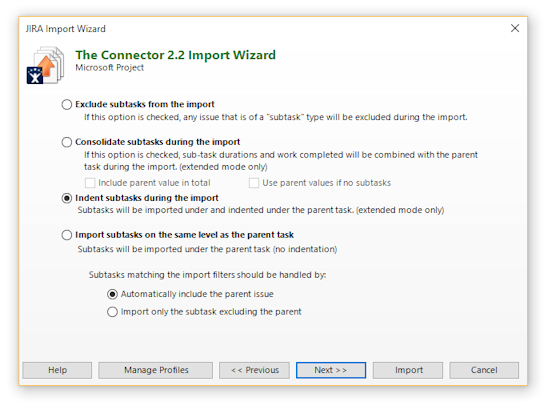
- Exclude subtasks from the import: If this option is chosen, any issue in JIRA that has a type of sub-task will get excluded from the import. This can be used if you wish to import only the high-level parent tasks into your project plan.
- Consolidate subtasks during the import: The consolidate option will also exclude the sub-tasks from the import, but it will consolidate all of the estimates of the children tasks and roll those up to the parent task.
- Indent subtasks during the import: If this option is chosen, sub-tasks are included in the import and will be imported and indented under their parent task.
- Import subtasks on the same level as the part task: Use this option if you wish to import all of the issues in JIRA, including the subtasks, but you don’t care about the issues relationship to its parent. This can be useful if a sorting mode is used that does not allow the task to be indented. NOTE: Even if this option is chosen, the relationship to its parent task in JIRA is preserved and updates still work correctly.
Click Next to proceed.
Assignment of resources when importing into the Project plan.
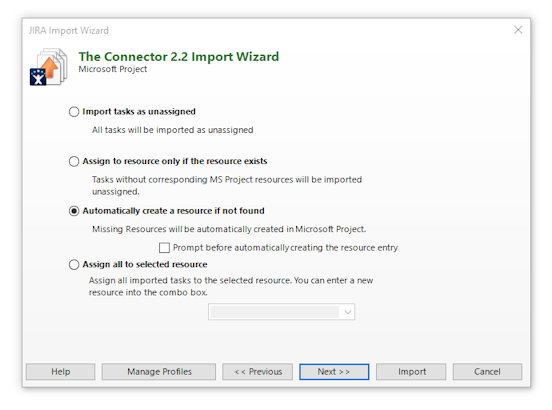
- Import tasks as unassigned: When this option is chosen, all of the tasks will get imported as unassigned, regardless of their assignment status in JIRA.
- Assign to resource only if the resource exists: This option will assign the resource only if a matching resource can be found in the current resource sheet of the open project. New resources will not get created and you will not be prompted about any resource that is missing.
- Automatically create a resource if not found: If this option is chosen, a resource entry in your current resource sheet will be created for each unique resource and the task will be assigned. If you check the optional prompt before automatically creating the resource entry, you will get the option to skip the assignment if it is missing.
- Assign all to selected resource: This option will allow you to assign all of the imported tasks to the same user. Simply pick the user from the available list of users and after the import completes, all of you tasks will be assigned.
Click Next to proceed.
Organizing the tasks in your Project plan.
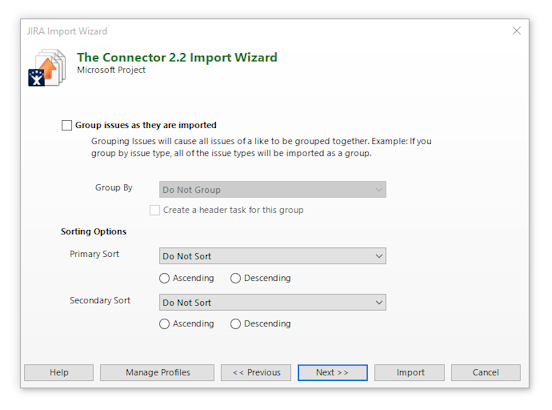
- Group issues as they are imported: The Connector allows you to sort and group the issues are they are being imported. You can use the Group By option to select one of the predefined available grouping options. Note: This option will not be available if you chose to use Automatic Import Merging on the screen that asks how to handle importing new tasks into an existing list.
- Sorting Options: To sort the issues as they are coming in, you can select both a primary sort and a secondary sort and control whether they are sorted ascending or descending.
Click Next to proceed.
Filtering what is imported into the Project plan.
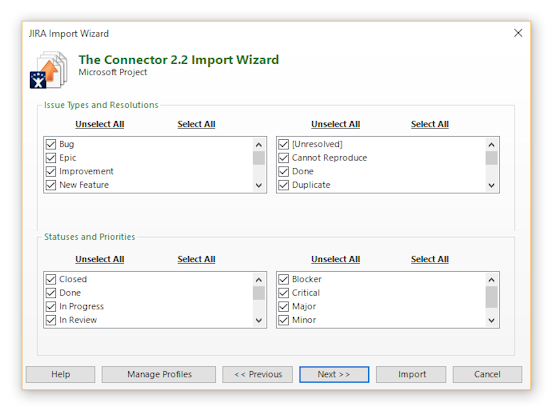
You can filter the import on the issue type, resolution, status, and priority. Simply check the options you wish to have included in the import. You can use the Unselect All and Select All options for checking all the options available in a specific group.
Click Next to proceed.
Filtering by Components and Versions
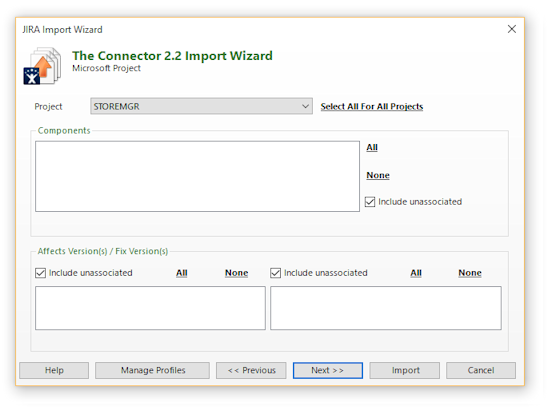
You can also filter the import by component and/or version. Simply select which versions and components you wish to have included in the import. The Include Unassociated check box will determine if any issue that is not associated with a version or component is included. You can use the All and None check boxes to check all or clear all the selection.
Click Next to proceed.
Filter by Resource Assignment

- Resource Assignment Filtering: You can use the resource assignment filter to control which types of issues are included. If you chose to only include the unassigned issues, than any issue that has an assignment will be excluded from the import.
- If task already exists, refresh all JIRA data: If this option is checked, The Connector will scan the current project sheet for existing tasks and if it finds a match, the import will update that task with the current values from JIRA. CAUTION: If this option is checked and changes have been made in Microsoft Project, your data will be overwritten.
Click Next to proceed.
Saving Profile
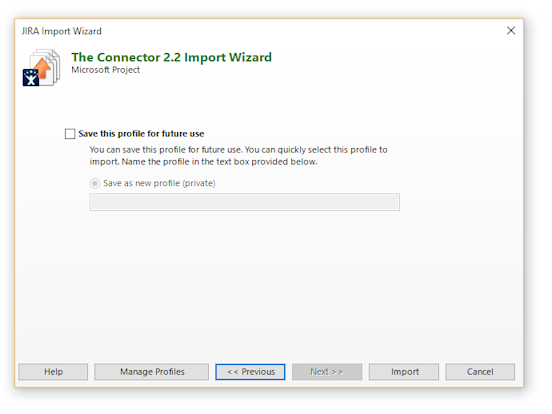
Save this profile for future use: If you wish to save this profile for future use, simply check the save check box and name the profile. You can name this profile anything you wish. Once saved, it will show up in the first screen of the import wizard as an available import profile.
Click Import and The Connector will begin importing tasks into your Project plan. You will be presented with a list of the projects import while it is working and then will be brought back to your Project plan screen.
Manage Import Profiles
The Connector provides a way for you to manage your saved import profiles. You can configure as many import profiles as you need, each having different filtering, sorting or grouping parameters. From the "Manage Import Profiles" dialog, you can access both your private import profiles and shared import profiles.
A shared import profiles is one that can be used by other users and is stored on a shared network directory. To use this option, you must enable the shared profile option. Click here for details.

- Add: Creates a new profile.
- Edit: Edit the currently selected profile.
- Delete: Delete the currently selected profile.
- Share: Makes the currently selected profile visible to other users. This will move the currently selected profile from the Private to the Shared tab. This option is only available if import profile sharing is enabled and the shared directory is online.
- Make Private Copy: Creates a copy of the currently selected profile with "_copy" added to the name and immediately opens the Configure Import Profile screen.
If you have the shared import profile option enabled, you will see the Shared Profiles tab as well. This tab will list all of the import profiles that are currently available and have been shared. Multiple users may all share import profiles and all the users will have access to those shared profiles.
If the shared directory is currently unavailable (offline), the only option available to the user is "Make Private Copy".
Caution: All changes made to Shared profiles will be reflected when any user chooses to use these profiles. Any user is allowed to edit the shared profile and make changes to the parameters of the import profile.
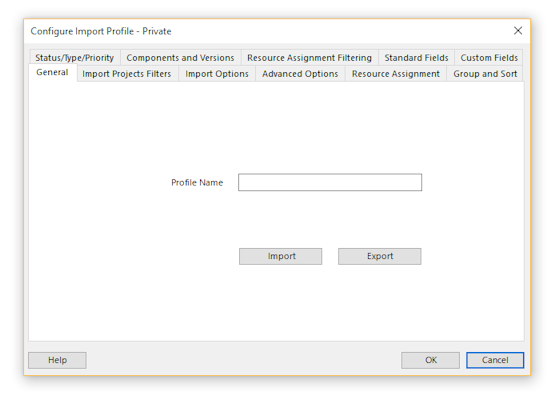
Configure Import Profile
Once you have saved an import profile for future use, you can edit it through the "Manage Import Profile" screen.
All of the options that are available on the import wizard are also available on this dialog. You can also add a new import profile through this dialog.